Back to storefront
Transform Your Nails with Pearlescent Starfish Magic! - Creative & 3D Nail Art
Creative & 3D Nail Art

Transform Your Nails with Pearlescent Starfish Magic!

In the ever-evolving world of nail art trends, few aesthetics have captured the collective imagination quite like "Mermaidcore." It’s a style that blends the ethereal beauty of the deep sea with high-fashion textures, opalescent finishes, and intricate 3D elements. Today, we are diving deep into one of the most stunning examples of this trend: a bespoke, multi-textured manicure that looks like it was plucked straight from an underwater kingdom. The image featured shows a breathtaking set of almond-shaped nails that combine milky pink bases with pearlescent 3D shells, hand-painted starfish, and delicate pearl accents. It is the epitome of a salon-quality look that bridges the gap between whimsical fantasy and sophisticated elegance. Whether you’re a professional looking for inspiration or a DIY enthusiast ready to level up your kit, this guide will show you how to recreate this shimmering masterpiece.

Google Web Story

Watch full 9:16 vertical story look

Watch Story

Shop this look

3 items
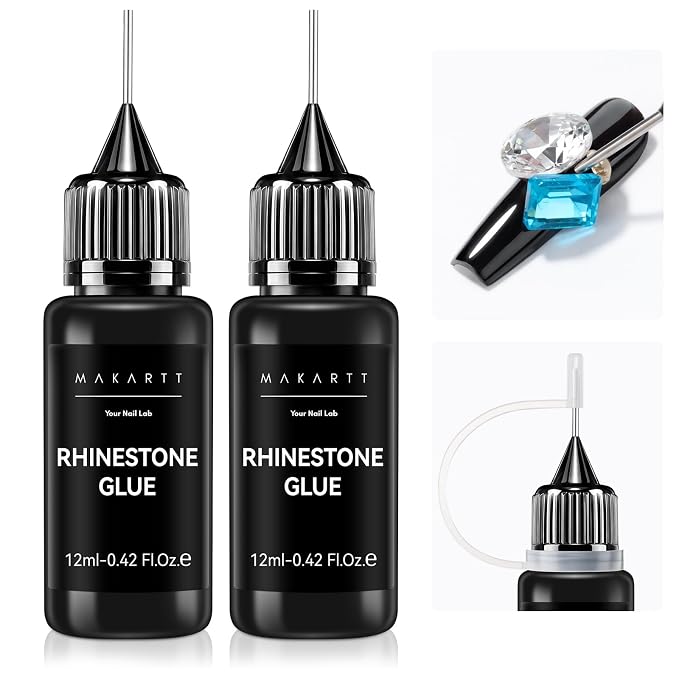
Makartt 2Pcs Rhinestone Glue, Strong Hold 3D Gel Nail Art Nail Gem Glue - Transform Your Nails with Pearlescent Starfish Magic!

Makartt 2Pcs Rhinestone Glue, Strong Hold 3D Gel Nail Art Nail Gem Glue

Shop
Makartt Pearl Gel Nail Polish Set 15ML : 6 Shimmer Mermaid Colors - Transform Your Nails with Pearlescent Starfish Magic!

Makartt Pearl Gel Nail Polish Set 15ML : 6 Shimmer Mermaid Colors

Shop
Makartt Gel Nail Builder Clear: 15ML UV Lamp 8-In-1 Builder Base Salon Home - Transform Your Nails with Pearlescent Starfish Magic!

Makartt Gel Nail Builder Clear: 15ML UV Lamp 8-In-1 Builder Base Salon Home

Shop
As an affiliate partner, I earn from qualifying purchases when you shop through these links.

Step-by-Step Tutorial

Follow these easy steps to recreate this nail art look

Recreating this DIY nails look requires patience and a steady hand. Follow these steps to bring the ocean to your fingertips.

Step 1: Prep and Prime

Start with a clean slate. Push back your cuticles and buff the nail plate gently. Shape your nails into a soft almond or oval shape—this elongated canvas is ideal for vertical designs like the 3D shell. Apply a high-quality base coat and cure under a UV/LED lamp.

Step 2: The Milky Base

Apply two thin coats of a milky pink gel polish. You want the color to be translucent enough to look "soft" but opaque enough to hide the natural nail line. Cure each coat for 60 seconds.

Step 3: Iridescent Chrome Overlay

Apply a non-wipe top coat and cure for only 30 seconds (it should be slightly "tacky"). Using a sponge applicator, rub the opal chrome powder over the middle, thumb, and pinky nails. This creates the iridescent "under-layer" that will shine through the 3D textures.

Step 4: Sculpting the 3D Shell (Middle Finger)

This is the "hero" nail. Using a liner brush and thick sculpting gel: Draw a central vertical line from the cuticle to the tip. Draw radiating lines outward from the base, mimicking the fan shape of a scallop shell. Cure for 60 seconds. Repeat the process to build height. Once satisfied, apply a pearl bead at the base of the shell using a tiny dab of gem glue.

Step 5: Hand-Painting the Starfish (Index & Ring Fingers)

On the nails without chrome, use a white or pale lavender gel to paint a five-point star. While the gel is wet, use a dotting tool to add tiny texture bumps across the arms of the star. Sprinkle a tiny bit of iridescent glitter or use a "cat-eye" magnetic gel for that extra sparkle seen in the image. Add tiny white dots around the starfish for a "bubbles" or "seafoam" effect.

Step 6: Swirls and Marbling (Thumb & Pinky)

For the thumb and pinky, mix a drop of white gel with clear builder gel. Apply it in swirling, organic motions to mimic moving water or the inside of an abalone shell. The unevenness is what makes it look natural!

Step 7: Final Seal

Apply a thick layer of high-gloss top coat over the entire design. Ensure the top coat gets into the crevices of the 3D art to give it a smooth, "wet" look. Cure for a final 90 seconds.


Perfect Locations & Occasions

Where to show and flaunt this nail art design

This isn't just a manicure; it’s a statement piece. Because of its intricate texture and light-reflecting properties, this look deserves to be seen in the right environment.
Tropical Vacations & Beach Getaways: Naturally, this design is the ultimate accessory for a seaside holiday. Imagine the way the iridescent chrome will catch the sunlight while you're holding a cocktail by the infinity pool. The 3D textures mimic the shells you’d find on the sand, making it the perfect "vacation mode" set.
Bridal Events & Summer Weddings: If you are a "cool-toned" bride or attending a beach wedding, this look offers a modern twist on the classic French manicure. It’s elegant and monochromatic enough to not clash with a dress, yet detailed enough to stand out in "ring-shot" photos. It pairs beautifully with silk, satin, and lace textures.
High-Fashion Festivals & Art Galas: Mermaidcore has moved from TikTok trends to the runway. This manicure fits perfectly at a summer music festival where "ethereal" and "fantasy" vibes are the norm. It also works as a conversation starter at art gallery openings, where the sculptural aspect of the 3D gel is appreciated as miniature wearable art.

How to Look After Your 3D Manicure


A manicure tutorial is only half the battle; maintenance is key to keeping those 3D elements from snagging or lifting.
  • Be Mindful of Snags: Because the shell and starfish are raised, they can occasionally catch on fine knits or hair. When dressing, be conscious of your hand movements.
  • Daily Cuticle Oil: 3D gel can be slightly more brittle than flat polish. Keep the surrounding skin and the nail plate hydrated with a high-quality jojoba-based cuticle oil to prevent lifting at the edges.
  • Avoid Harsh Chemicals: Always wear gloves when cleaning or using hair dye. Strong chemicals can dull the "mirror" finish of the chrome powder and yellow the clear 3D gel.
  • Professional Removal: Do not attempt to peel these off! Because of the builder gel used for the 3D effects, these nails are very strong. They should be soaked off or filed down by a professional to ensure your natural nails remain healthy.
  • Frequently Asked Questions (FAQ)

    Tap or click any question to expand details

    Conclusion & Styling Summary

    Final takeaway tips and styling thoughts

    The ocean-inspired 3D manicure is more than just a trend—it's a celebration of texture and light. To style this look, think "fluidity." Pair these nails with iridescent fabrics, sheer organza tops, or linen dresses in shades of seafoam green, lavender, or crisp white. For jewelry, follow the lead of the image: gold bands with pearl accents perfectly complement the warm pink base and the cool-toned chrome.
    By combining the latest nail art trends with professional techniques, you can transform your hands into a work of art. This set proves that you don't have to choose between being "extra" and being "elegant"—you can truly have both.

    Value Proposition Summary

    This guide provides a comprehensive manicure tutorial for creating salon-quality 3D mermaidcore nails. By focusing on nail art trends and DIY nails techniques, users can achieve a high-end look at home or better communicate their vision to their technician. Using the right sculpting gels and chrome powders ensures a durable, professional finish that stands out in any setting.

    More looks you'll love
